Installation
Note: These tiles designed to be used internally, They are not suitable for shop frontage or patio.We also do not recommed using them for bathroom where the level of humidity is high and wet..
Direct Installation On Wall:
- You can use any adhesive material for wood (glue), These are available at most DIY shops and at low price,
- Please make sure that you cover the entire back of the tile with the adhesive material,
- When you start installation on wall, start from bottom up.
- Hold the tile and push it against the wall, Make sure there is no gap between tile and wall.
- Make sure tiles on the first row are glued firmly before moving to the next row.
- You can use screws to support the installation, especially if background is made of wood.
- 2 Screws should be enough to hold each tile. For large heavy tiles you may need more screws.
- If you install tiles without using screws, then make sure your tiles are stuck firmly before adding more above them.
- In this case you need to push each one against the wall and hold it for 30 seconds or more.
- You many need to check the previous tiles and push them for few seconds to keep it stuck again.
- Leave each row for 10-30 minutes for the glue to dry up
Using MDF Or Plywood
-
You can glue the tiles on MDF sheet first then you install the sheet on the wall..
-
Cover the back of tile with adhesive material, Push tiles against MDF sheet to make sure there is no gap.
-
You may use screws to support installation.
-
Leave each sheet for an hour or more.
-
Lift the sheet and install it on wall using larger screws.
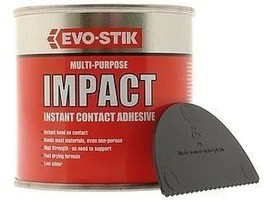
we recommed this adhesive which is fast acting and strong, also available in most DIY shops usually at £6-£8 per 250ml.
After installation, check each tile, make sure they are firm, if any tile not installed properly then use more glue and screw to hold it firmly.You can remove some screws later on if you think the installation is firm enough.